Plaid fabrics offer a lot of fun variations for a button-down shirt - you can put pieces on the bias (pockets, cuffs, button placket and shoulder yoke) or even get a chevron effect on the bodice front, or by piecing the shoulder yoke.
Plaids also can look like a home-ec disaster if you don't get the matching done correctly. I thought I'd post a little how-to on working with plaids as I sew my Archer button-down. There are a couple of simple tricks I've picked up that make the matching very simple, so I'll share those here as I make my Archer.
Today, I'm cutting out fabric and I need to prepare my pattern for my plaid. There are two changes that I'll need to do to my pattern before I cut out any fabric.
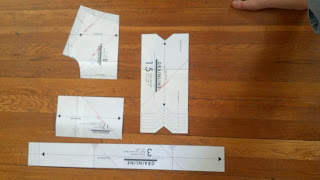
- Choose the pieces you want to cut on the bias, and alter their grain-lines by 45 degrees (new grain-lines marked in red below)
- Find all pieces to be cut on-the-fold and make them full-sized. You cannot cut plaid fabrics on the fold, for any pieces. The plaid you can't see will not line up. All pieces must be cut single. Below are all the pieces from the Archer pattern that need alteration
Using swedish tracing paper, I trace around the pattern, leaving 1/2" extra so I can tape them together. Be sure to transfer all markings.
Then, cut it out, and tape it together
Do this for all four pieces and you're ready to cut out your fabric.
For pieces that need in two mirror copies, like the sleeves or the front bodice, cut one from the fabric, and use that piece face-down as the pattern to cut out the second. This lets you match the plaid all around. It takes a little pulling & pushing to get the flannel to move around, but you can see my two bodice front pieces below
For pieces that need in two mirror copies, like the sleeves or the front bodice, cut one from the fabric, and use that piece face-down as the pattern to cut out the second. This lets you match the plaid all around. It takes a little pulling & pushing to get the flannel to move around, but you can see my two bodice front pieces below


No comments:
Post a Comment