Saturday, December 14, 2013

Some Shirts in progress

I've been making a second Archer shirt, in cotton lawn (because THAT's seasonal), and have also started a Renfrew (my first one can you believe it?)

Here is a poor quality photo of the Archer.  I stretched the under-collar at the points recommended in David Page Coffin's book, and it worked great!  It turns so gracefully.

All that's left is cuffs, hem & buttons now - but I doubt I'll wear it until spring so on to more important & seasonally appropriate stitching...

Several long-sleeved knit Ts in black & grey have developed holes.  Since I vowed to purchase no clothing, it was time to buy some boring fabric.  I've never been less excited to get a package of fabric delivered in my life.  I like to wear black a lot, but it's not a color that jumps out at me when fabric shopping.

Although the Renfrew calls for a stable knit, I was feeling brave and decided to do it up in a rayon tissue knit.  To top it off, my knit was off-grain and no amount of coaxing or steaming could get it to behave.  I thread-traced some grainlines in, and took my time cutting it out.  Since it's a tissue weight, I cut out two front panels so I don't have to layer it.  Here it is so far, with just the shoulder seams & the cowl done.  I love rayon knit - it's so drapey, and soft!


Friday, November 1, 2013

Fitting Woes

I signed up for Susan Khalje's Craftsy course (The Couture Dress) about a year ago.  I made a muslin & started fitting it.  Then, spring came & I gave up on the fall sewing.  I also lost 20 pounds this summer.

So, now that it's fall again I started in on the muslin, in an attempt to continue the fitting process.

I made one bad mistake - which was using a water-erase marker to transfer some markings.  Water erase disappears if you leave it a few months wadded up in a corner with all the other UFOs.   Somehow, up became down & without realizing it I stitched a few things on upside down, and then fitted like a mad woman

How do Mad Women fit?
  • Baste
  • Try on 
  • Pin out excess
  • Poke myself with pins, use muslin scraps as bandages
  • Curse a lot, drink some tea
  • Mark new lines
  • Rip out old seam
REPEAT 20 times.  Even if you weren't Mad at the beginning, you will be after a few iterations.

Like I said, I'm smaller.  However, I'm still lazy.  So, I didn't rip it all apart & alter everything down.  I decided I'd FIT out the 20 lbs.

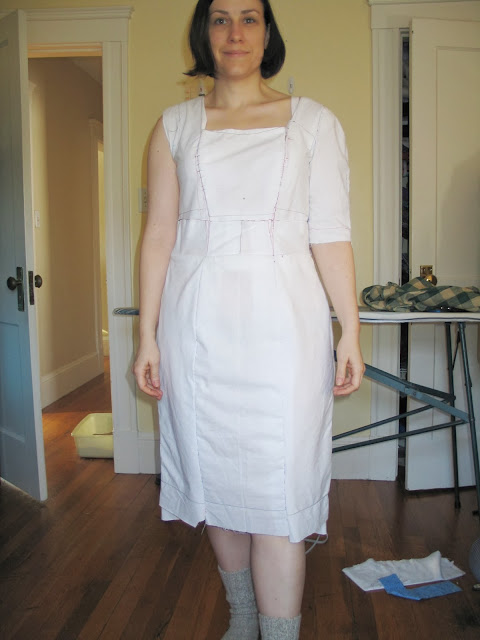
I ended up with a strange looking garment - with mis-matched panels at the waistline.  Hmmm, I know I'm smaller, so I decided they needed to be smaller, and shrank them all down.  I did this despite the fact that I looked carefully at the pattern and saw that it's the side seams where the sizes really differ.  I ended up with this mess:


I recognized that the lines of the garment center panel were not the same as the line drawings or other people's patterns.  So, tonight I ripped it all apart to re-size correctly.  As soon as I did this, I saw what went wrong - I sewed the waistband on UPSIDE DOWN.  The waistband is really an extension of the bodice, and should continue to taper inwards.  Instead, mine was inverted, and grew towards the waist - which I then tried to fit out.  But, the center panel was attached with the smallest side up - and so I shrank the entire dress around it.  Oops.

Here's the fixed waistband - you can see that there is a significant curve to it, and my red fitting marks from when it was upside down are still visible on the center panel.  I think the whole garment will lie much better once I alter the rest and put it in correctly.


We'll see what I can come up with the second (or 22nd) time around, after shrinking all the pieces down to a size 16.

Thursday, October 24, 2013

1930s Sport Coat - an obsession

I watch a lot of British mystery & crime dramas.  One of my favorites is Poirot - with all of its great outfits from the 1930s.  Lately I've become obsessed with a particular cut of ladies' sport coat.  It's also common in menswear sport jackets - Captain Hastings is often wearing one on the show.

The back has a waistband and a center back pleat (or mirrored side pleats) to allow expansion across the shoulders.  I think with my broad back and slim waist, this could be a comfortable and flattering option for me.  Here are some examples from Sears Catalogs - in the last one they call it "Action Back"


I found & purchased this pattern online at Miss Betty's Attic (a favorite Etsy pattern source).  I think it's got exactly what I'm looking for!


Tuesday, October 22, 2013

Why I no longer use Pellon

This is just a quick post about my favorite interfacing, and why I'll pay extra for it.

I used to use Pellon's lightweight woven fusible interfacing for my shirt collars & cuffs.  I have had trouble in both lightweight & medium weight fabrics with the fusible both shrinking and showing the glue spots.  I grew up with Pellon, and it's carried at the local shops - so I didn't know any better.

I purchased some ProWeft Supreme medium-weight interfacing from Fashion Sewing Supply a while back, and after working with that fusible, I decided to go all-in and purchase various weights & weaves for all my interfacing needs.

I have cut out another Archer shirt, this time in a cotton voile.  I'm interfacing the collar with ProSheer Elegance Light, and thought I'd share two comparison photos of cotton voiles.

First a Pellon interfaced collar - a sad affair that made my voile look like pebble crepe:

Next the ProSheer Elegance - see any wrinkles or divets?  No, you don't - because there aren't any.

Thursday, October 17, 2013

Shirt Reveal!


My shirt is done!  I'm so happy with the fit & the comfort of this thing. I have a few small alterations planned for the next version (oh yes, there will be a next).  Here is a link to my review.


Wednesday, October 16, 2013

Sneak Preview


My Archer is DONE!  Here's a quick snap en-route to NYC.  More photos coming soon...

Monday, September 30, 2013

Baby Steps

Grainline Studio

I've made a little progress on my flannel shirt.  Everything is cut out and interfaced with ProWeft supreme light (I will never use Pellon again after going to Fashion Sewing Supply interfacings - I will write a post some day on how Pellon has ruined my garments).

I've made the plackets and attached the pockets

The stitching on the pockets was a little mysterious, so I pulled out the trusty David Page Coffin book and of course, he has a very helpful image to show a few different pocket and top-stiching options.  I went with the little triangle reinforcement on the right.


I have threaded my machine with purple needle, and black bobbin, since I had a black bobbin in the machine already & I'm lazy.  This seemed like a good idea, except that it meant I needed to stitch both sides of my placket from the top.  I ended up missing part of an edge, and had to blind stitch it down by hand.  I think I'll wind a purple bobbin before I get to the collar and cuffs so I can do those correctly.

Sunday, September 22, 2013

Working with Plaid

Plaid fabrics offer a lot of fun variations for a button-down shirt - you can put pieces on the bias (pockets, cuffs, button placket and shoulder yoke) or even get a chevron effect on the bodice front, or by piecing the shoulder yoke.  

Plaids also can look like a home-ec disaster if you don't get the matching done correctly.  I thought I'd post a little how-to on working with plaids as I sew my Archer button-down.  There are a couple of simple tricks I've picked up that make the matching very simple, so I'll share those here as I make my Archer.

Today, I'm cutting out fabric and I need to prepare my pattern for my plaid.  There are two changes that I'll need to do to my pattern before I cut out any fabric.
  • Choose the pieces you want to cut on the bias, and alter their grain-lines by 45 degrees (new grain-lines marked in red below)
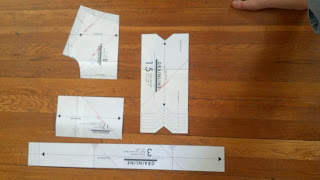
  • Find all pieces to be cut on-the-fold and make them full-sized.  You cannot cut plaid fabrics on the fold, for any pieces.  The plaid you can't see will not line up.  All pieces must be cut single.  Below are all the pieces from the Archer pattern that need alteration 


Using swedish tracing paper, I trace around the pattern, leaving 1/2" extra so I can tape them together. Be sure to transfer all markings. 
Then, cut it out, and tape it together 

Do this for all four pieces and you're ready to cut out your fabric.

For pieces that need in two mirror copies, like the sleeves or the front bodice, cut one from the fabric, and use that piece face-down as the pattern to cut out the second.  This lets you match the plaid all around.  It takes a little pulling & pushing to get the flannel to move around, but you can see my two bodice front pieces below

F#$k Finishing UFOs - Bring on the flannel!!

Maybe I can't bear looking at all these UFOs, but I'm sure as $#!T not going to finish one.  I haven't sewn in a month (excluding small alterations & mending).  I blame all this fuss about finishing what I started.  If I really wanted to sew those things - they'd be done by now.

Fall is here, and so is my Grainline Archer pattern.

I have a lovely plaid flannel I purchased last fall at "The Textile" in Greenfield, MA or "Eastern Textile" as we locals call it (was there ever a Western Textile?).

I've had great success with sewing plaid in the past as you can see below, so I am READY to go.

Yesterday I assembled the pdf pattern, cut it out in a size 12 grading to 14 in the hips.  I'm not making a muslin, because the 12 should be a little large, and I will lose my motivation if I cut out one more thing I'm not going to end up wearing.  If the shoulders are too tight, so be it!


Tuesday, September 10, 2013

UFO #2 Butterick 5824

Unfinished from last winter is Gertie's coat - Butterick 5824.  I have a bodice muslin that fits well after a few alterations.  The fabric is a discount wool houndstooth purchased at Sew Low Discount fabrics in Cambridge, Ma.  The poly charmeuse lining was also purchased there.


I want to interline the bodice for warmth, and purchased 2 yards of sew-in Pellon Thermolam.  I've read up on different techniques this here.  I plan to try the second technique, and baste the Thermolam inside the garment fabric after sewing it up.  For me, this is preferable to underlining because I do not want to add bulk to the seams.  I also didn't want to try quilting the Thermolam to the lining, because I don't like the look of a quilted lining on a formal coat.

I took the wool to my dry cleaner to steam, so that it would not shrink.  It was $25!!  I won't be doing that again any time soon.  My other woolens I have steamed with the iron at home, but with 7 yards of 60" wide fabric, I decided to spring for the dry cleaner.  I took it home, and patiently cut out 3/4 of the garment fabric, including adding tailor's tacks - but stopped when the weather started getting warm.

Now that it's fall once again, I'm tempted to start on this one.  I am terrified to attempt making a coat, but with the ease of kimono-sleeves this should be a good introductory garment. I'm familiar with basic linings and bound buttonholes from other projects.  The new-to-me techniques are the collar, and the interlining.   This UFO seems simpler than the jacket in my last post.


Wednesday, August 14, 2013

Vogue 1132 - UFO #1

I have never made a jacket.  I'm just not that advanced of a seamstress yet I tell myself.

However - Maybe the time has come.  I have made several wool skirts, with organza underlining, and various lining styles as a prep.  I've learned how to work with bulkier and handwoven woolens.  I have purchased & read the literature.  I have selected a pattern.  I have fabric, lining, hair canvas, twill tape, clapper, etc etc etc.  I even have a first muslin.

Here's a look at the fabric, lining & pattern.  Vogue 1132 - a jacket with a full peplum in the rear.  It's one drawback is that it's a one-piece sleeve, but I'm willing to live with that for a first jacket.


I made a muslin last fall.  I'm a little smaller now, but basically the same size.  I've done a round of alterations on the bust, and the back - shrinking the front and expanding the back.  I also have noted that I need to drop the back waist by 1", and possibly do a full upper-arm alteration.  Below are some photos of the wrinkly chalked-up mess.

Here you can see the sleeves bind, and the shoulder point is off my shoulder.  My sleeves always bind - I know I have square shoulders, and consequently my armpit is much higher than a normal person's. When I made this muslin, I had the bad habit of only bringing up the outside of the shoulder, and not raising the bottom of the armscye.  This will need to be re-done.

Here you can see I have successfully altered the princess seam to sit on my bustline, and taken in the excess on the lapel to account for my small bust.

The center back seam is not in the center because I only added the left sleeve.  This is contributing to the dropped shoulder problem.  I'll need both sleeves on to fit the armholes and shoulders properly.  The low-armscye sleeve binding problem is really apparent here.


This is a good candidate for a next project, but I fear that it will take me forever and I will grow bored and drop it again.  I could sneak in some simple sewing between bouts with this thing, as I have some nice silks recently purchased at MPB Day that will likely end up as a few sorbettos:

Unfinished Business

I have reached that spot between finishing one garment, and starting another.  There are so many ideas in my head, and in my sewing room of what could be my next project.

At times like these, I shop for new fabric (even though I don't need more).  I go through my patterns and vintage catalogs for inspiration.  I fixate on a color, a texture, a new technique to learn.  I read sewing books before going to sleep.  I clean the sewing room.

Cleaning the sewing room means putting away tools used in the last project, putting away unused notions, deciding if scraps of fabric should go in:
  1. The trash
  2. The rag-rug pile
  3. The cloth closet (maybe there's still a half-yard left)
Then there's folding up and re-filing the last pattern, vacuuming the cat fur off the ironing board (why must they sleep there?), and last, but not least - re-folding & scrunching into the corners & slipping onto hangers all the unfinished sewing projects I have abandoned but not put away.  They always seem to have gotten out-of-place since the last time I folded, dusted and hung them. This last part will nag at me as I sit down to look at a new pattern - Should I really be sewing something new, or should I instead finish these UFOs...  They stare at me now - I see them out of the corner of my eye when ogling new fabric.  I pull out a new pattern, and there's one folded up behind it.  I leave the sewing room to escape.

There comes a point where I have to finish them, because I need to reclaim the space, and my dignity - and I think I may be at this point.  What I really wanted to write about as my first post today, is Vogue 1351, and some beautiful fuchsia pink wool crepe.  However, it's time to itemize & confess all these UFOs that are still on or near the sewing table.

Most are muslins.  Some are past-muslin, and being cut out. One garment is waiting around only for the back of bound buttonholes & a hem - except that I think it may be too ugly to wear.

So, the next few posts will be featuring these garments, and their current state.  Maybe then I can decide  their fate - to sew, or not to sew...